Place registrants into a holding space until your approval

 ️ The Pending status is available on all the paid plans. Other automation features are available on the Silver and Gold membership plan (see our Membership plans here).
If you don't want your registrants to have access to your circle right away, you can put them in a pending status. This can be helpful if you want the program space to open for members on a specific date and if you want to register people before your program launch date.
When selecting the Pending status, managers will have to review registrants in the Members area to approve them. We'll show how this is done a little later.
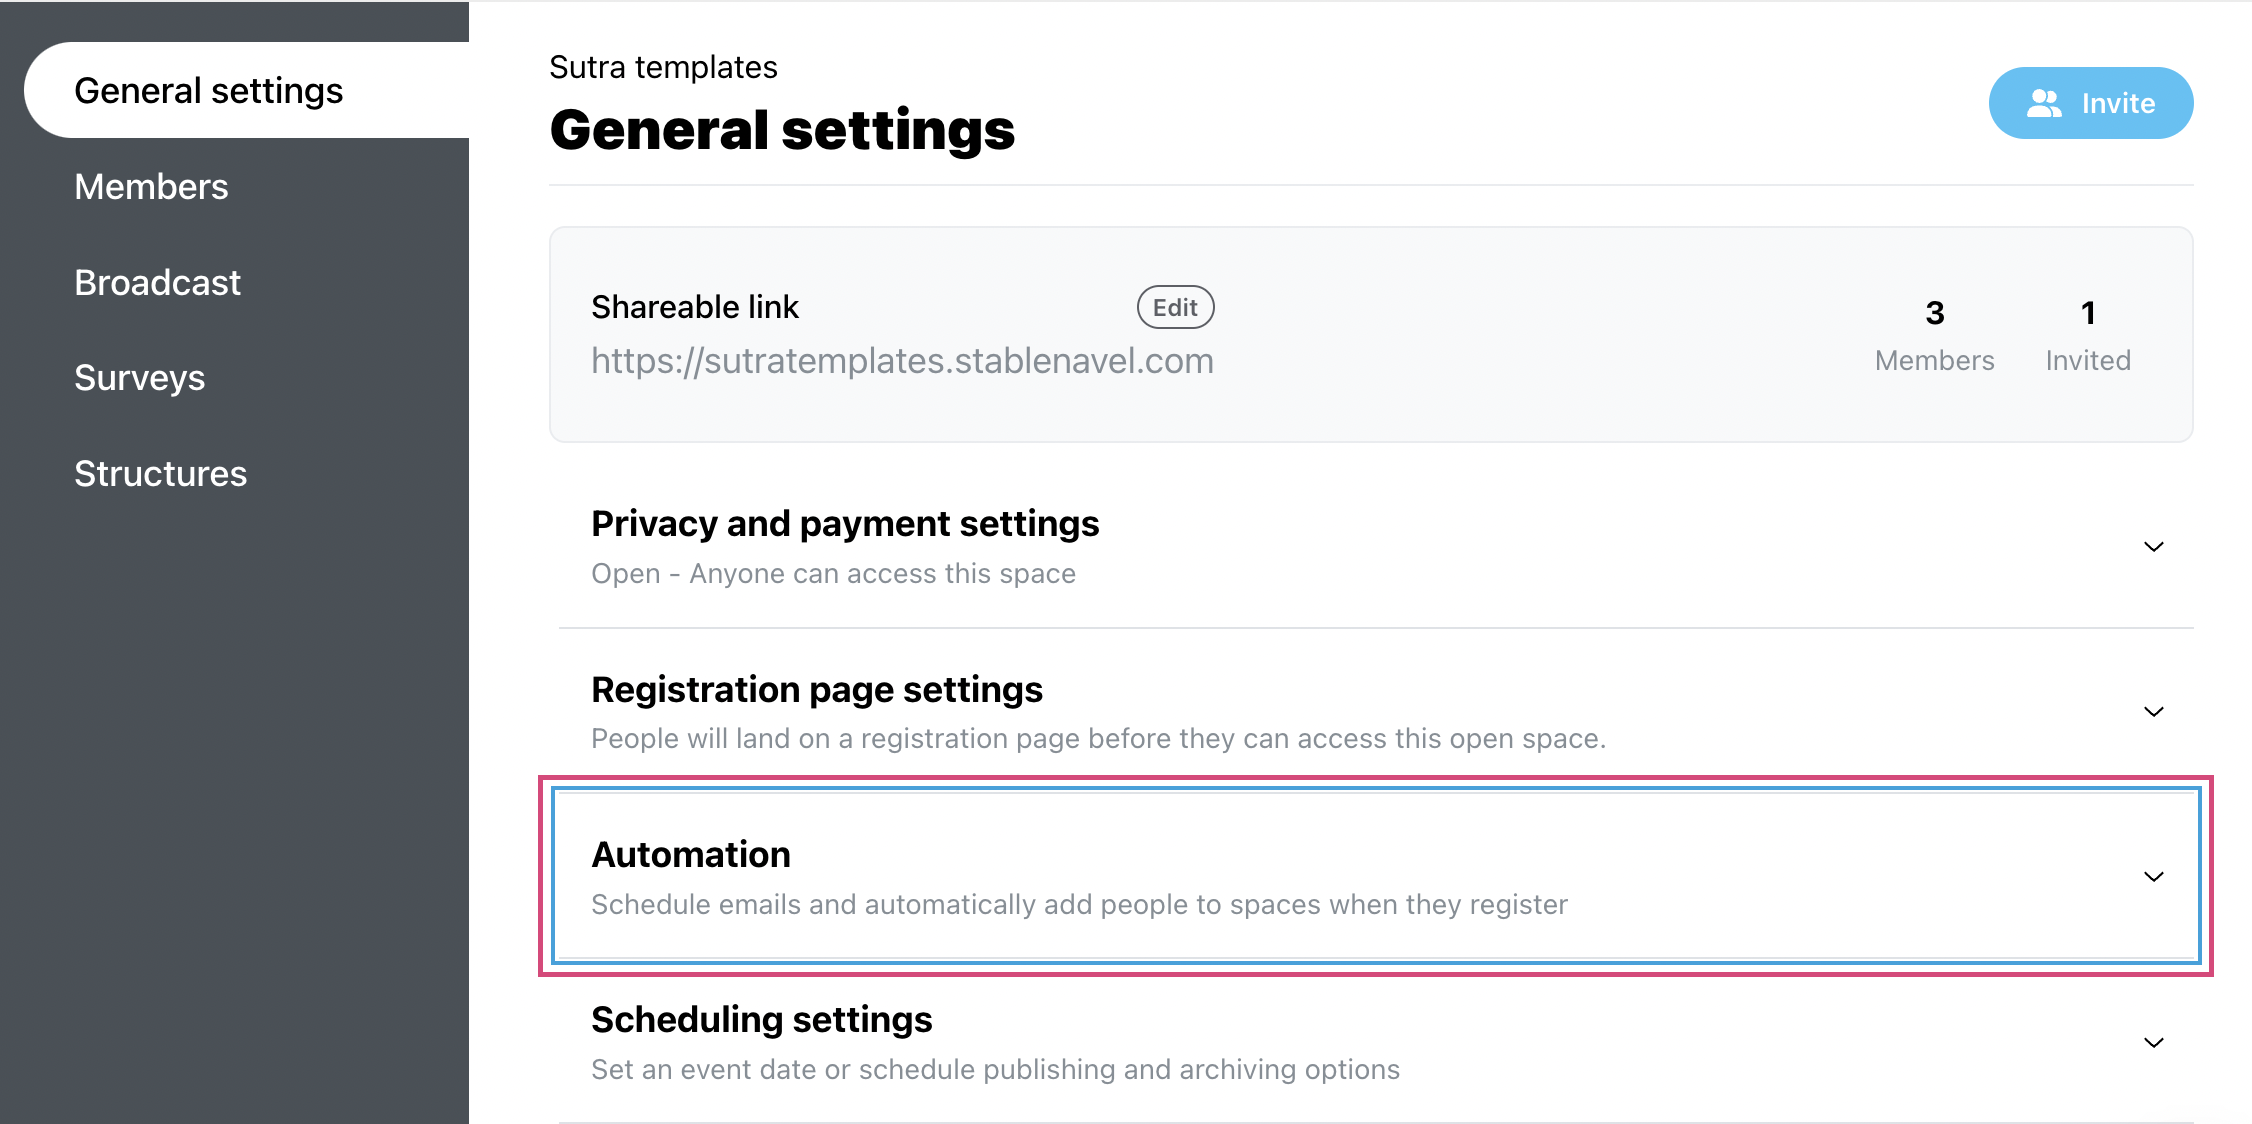
Choose your program space (click on the name of your program), click on Manage on the top menu and select the Main settings tab. Here you will be able to add the pending status and other automation features.
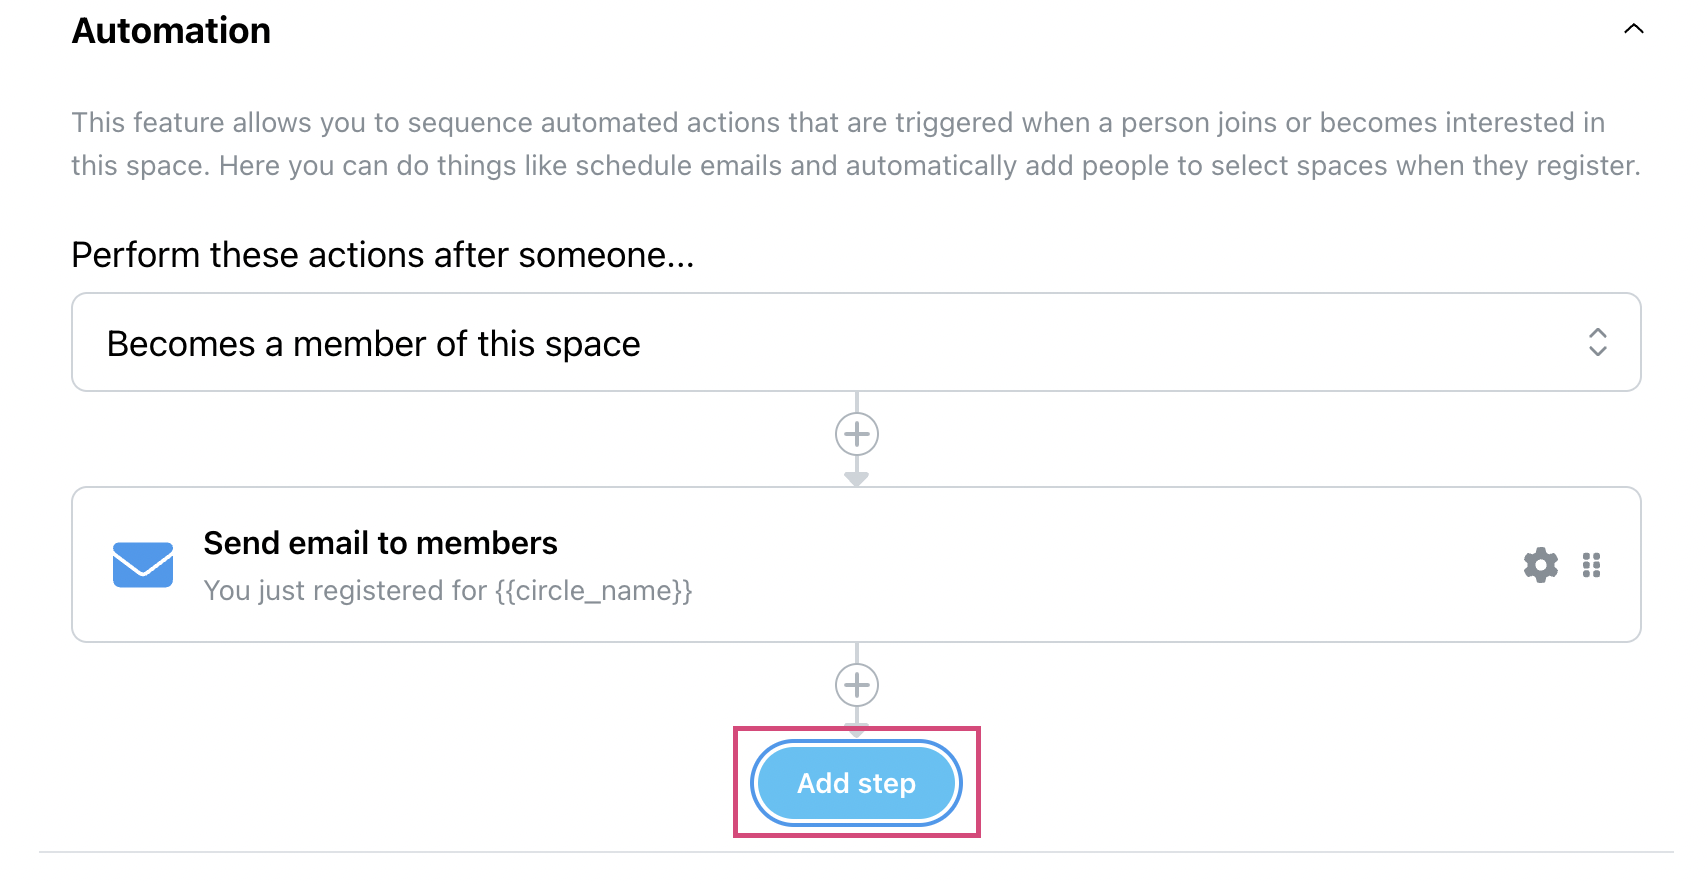
Click the blue Add step button.
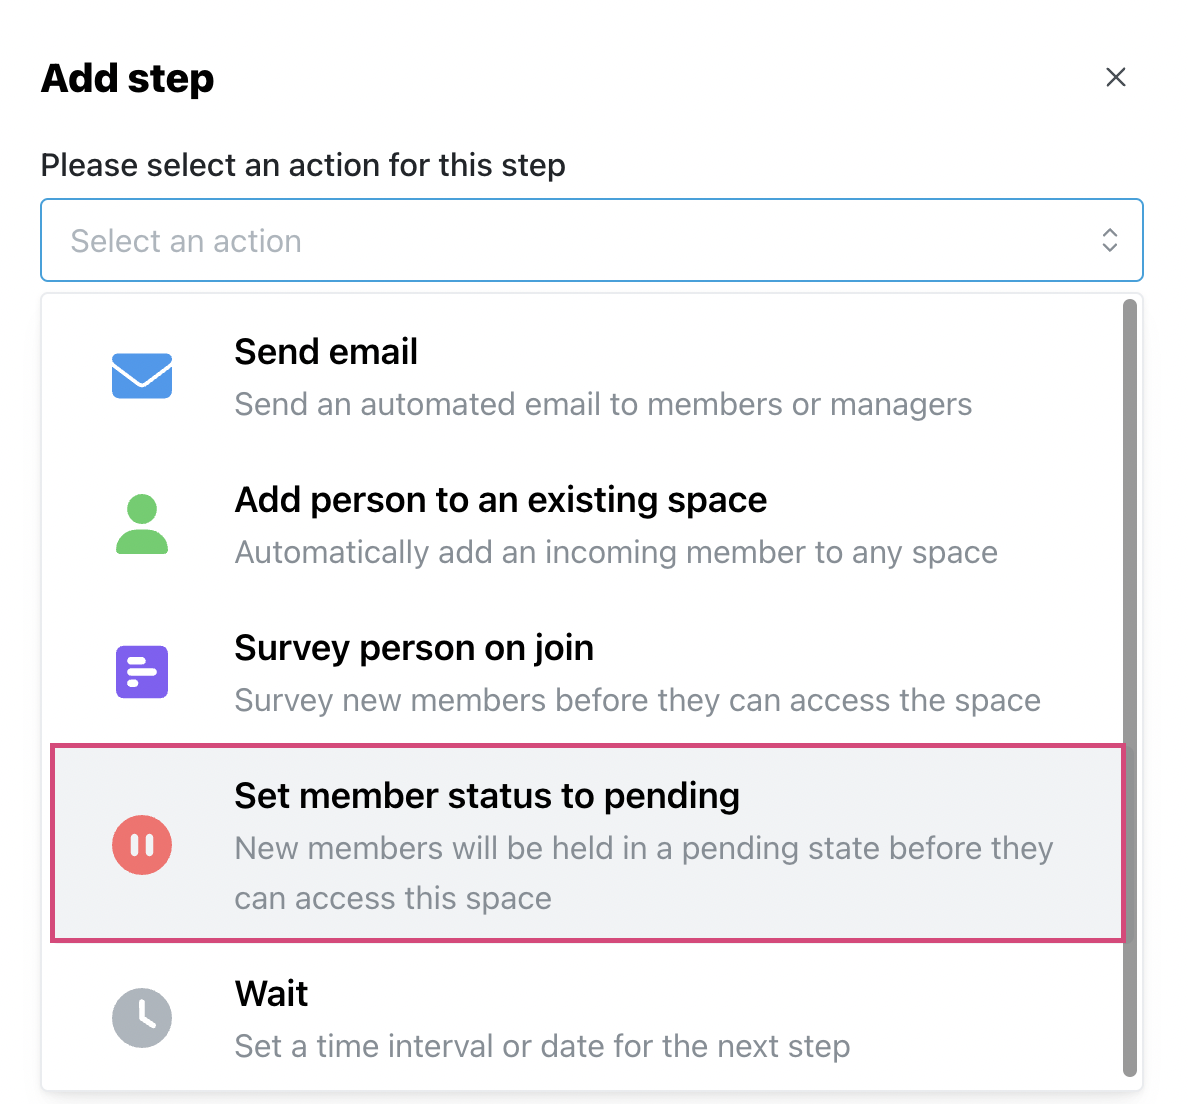
Then select Set member status to pending option from the dropdown menu.

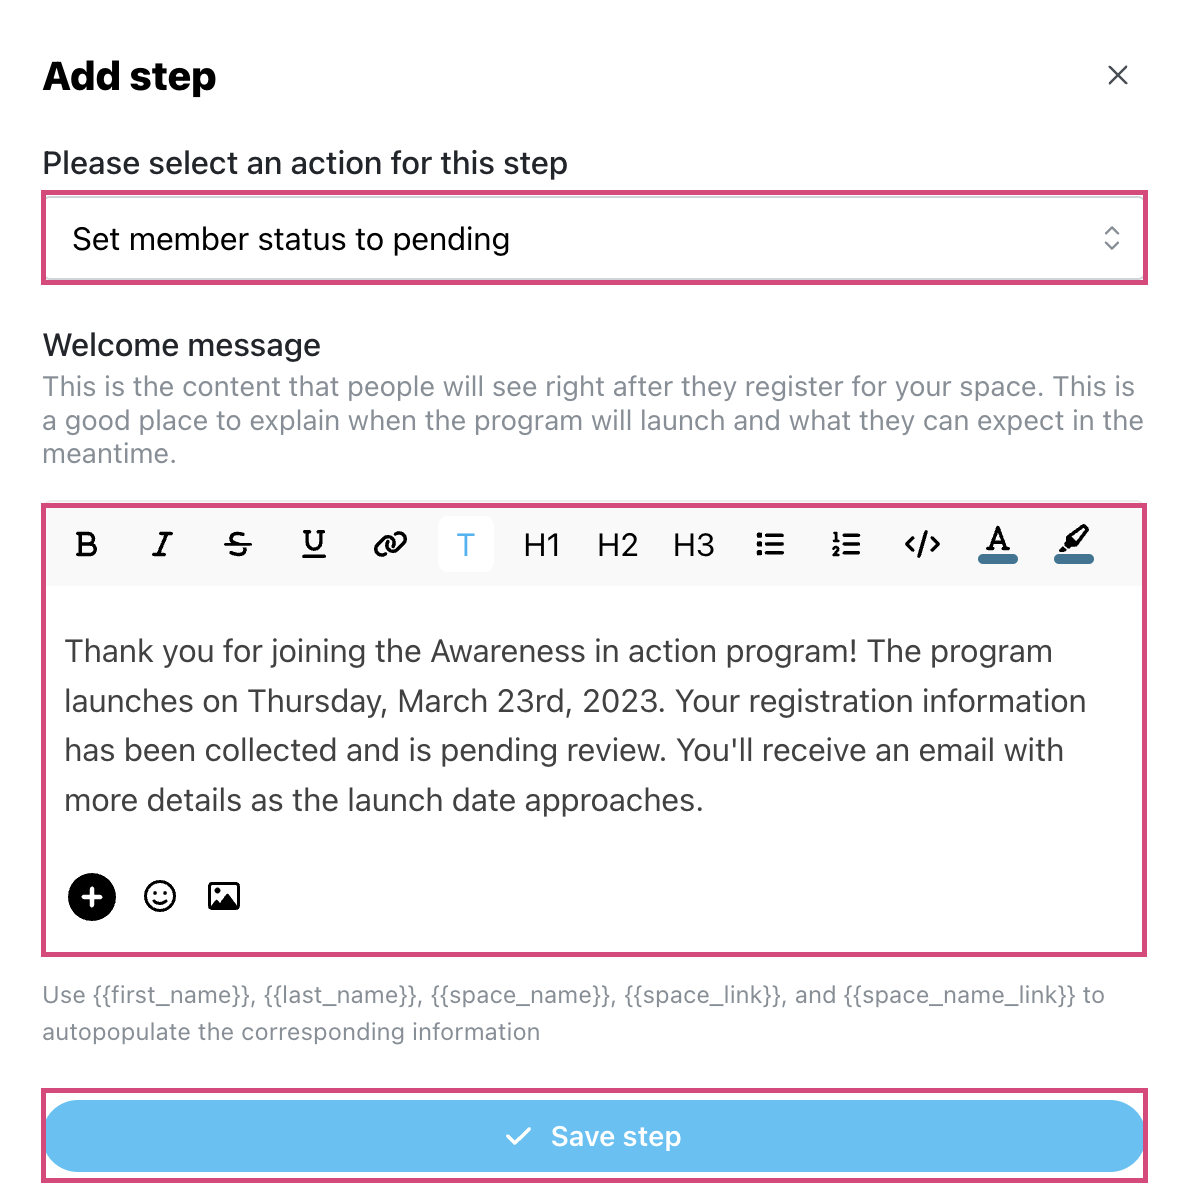
Important: Write a welcome message for the pending members. This is the content that people will see right after they register for your space. This is a good place to explain when the program will launch and what they can expect in the meantime.
Confirm your action by pressing the blue Save step button. Great job! Now when people get registered to your program they will not see your space right away until you approve them
 TIP: Welcome message for pending members
You'll always be able to delete the pending status and edit the welcome message.
Optional step. Approval email. You can choose to send an approval email - an email members receive when approved by the manager.
️ Additional Automation steps are available on the Silver and Gold plans. If you have a Bronze plan, you can send a Broadcast email (this will be appropriate if you approve all the members at the same time)a. For this, go to Automation and add a new step - send email to members.
b. Write a new email.
Example:
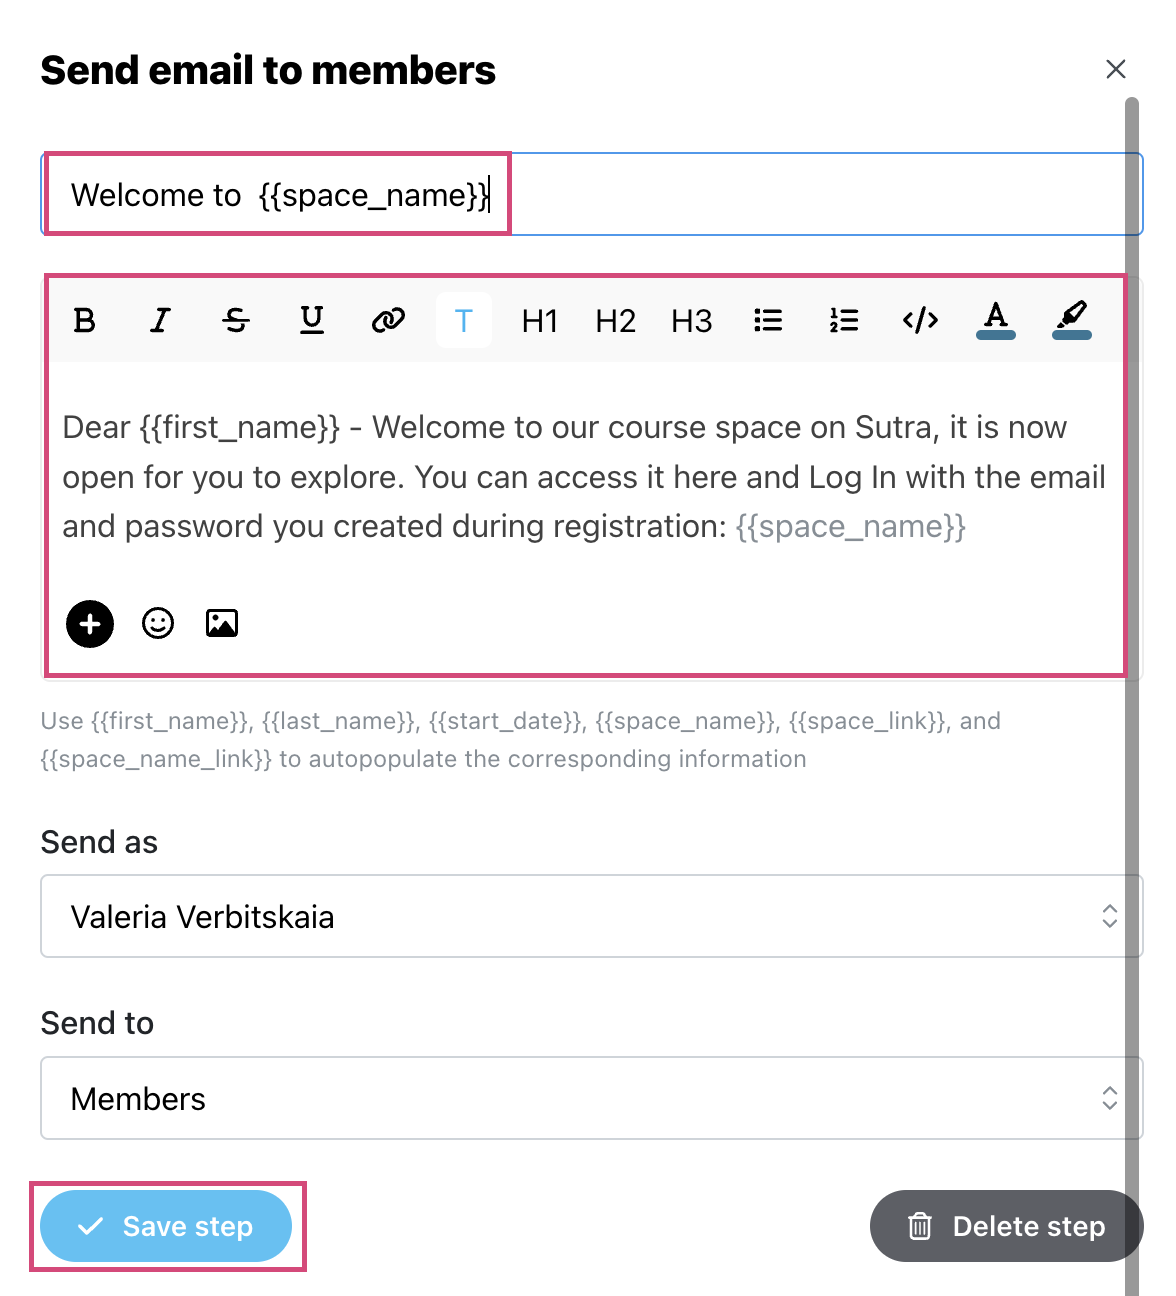
Sutra will dispatch an email to notify the member when they've been added to the program space. If the program is launched on a specific date, you can use this email as an announcement for the opening. We recommend putting some orientation information in this message.
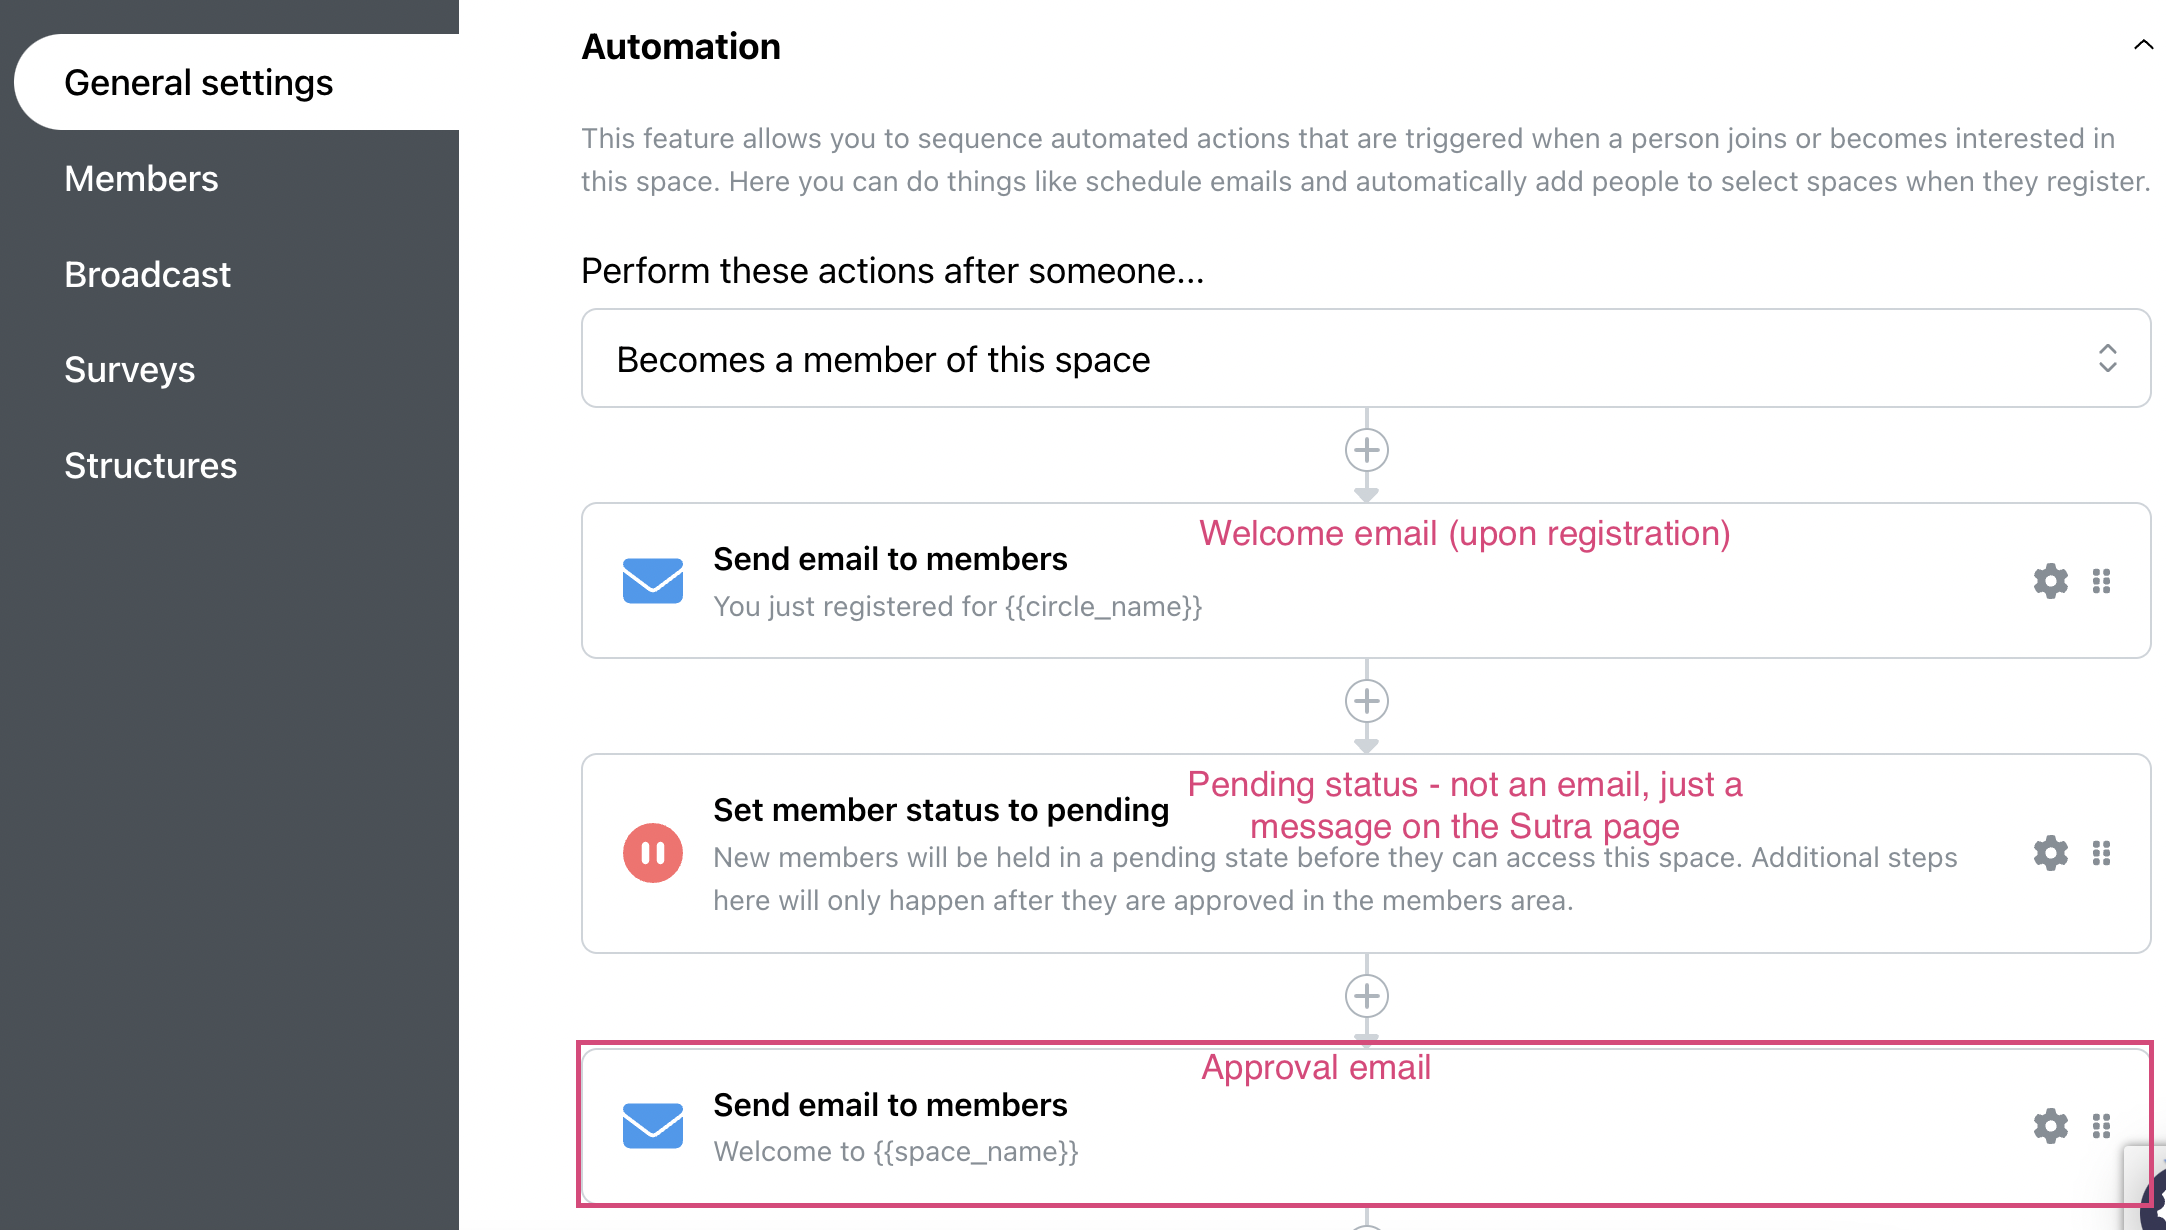
c. Now you have 3 Automation steps:
Approve members
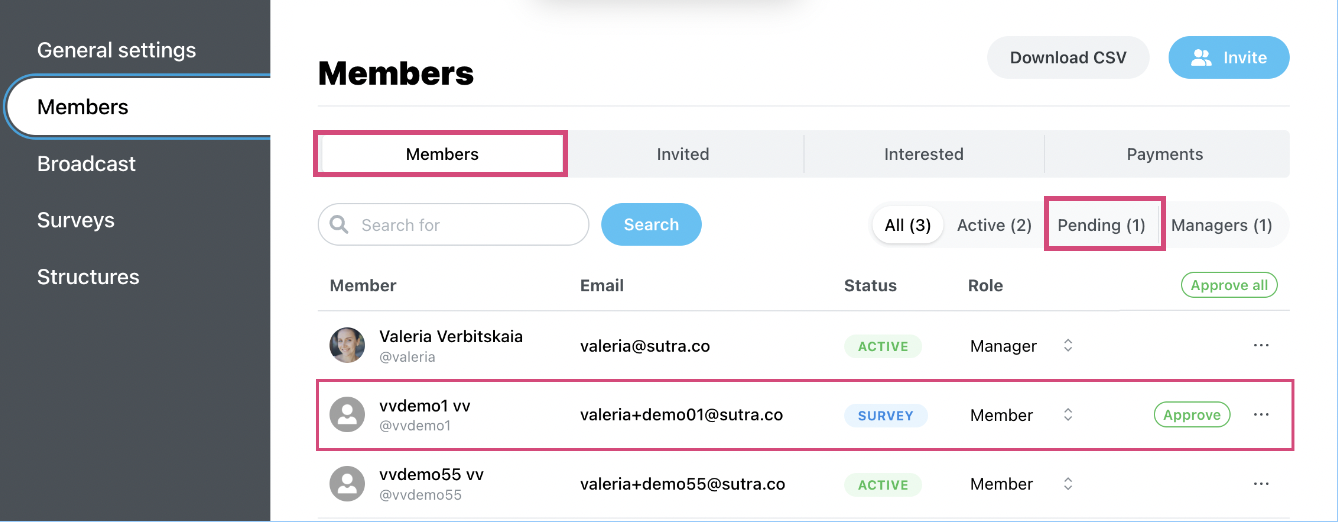
When you're ready to let your participants enter the program, you will need to approve them if they are in pending status. To approve a pending member, click on Manage on the top menu and select the Members tab.
Then click on the Pending tab. Here you can see which members are in pending status. You can Remove or Approve members. Approve one member at a time by clicking on the Approve link next to their name or all members at once by clicking on the green Approve all button.
The approval email (if you have one) will be dispatched automatically once you approve a member.
If you add the Pending status we recommend you edit the Welcome email that your members receive after the registration. In the Welcome email you can let people know that they've got registered but they will be able to access the program space only after approval. This Welcome email will be the confirmation of their registration.